The power of Infrastructure as Code (IaC)
Infrastructure as Code (IaC) can seem intimidating at first glance. Especially when compared with creating cloud resources using a CLI or web console which seems more intuitive. You just choose what you want based on a fixed list of options, and click the button or execute a command.
Creating cloud resources in this manner is imperative as opposed to Infrastructure as Code which is (ideally) declarative. With Infrastructure as Code, you define what you want on a high level and it get’s created. Dependencies between different resources, such as load balancer and a virtual machine, are automatically handled by the tool instead of typing out commands or clicking through UI in a correct sequence.
Our favourite Infrastructure as Code tool at Verifa is Terraform since it is cloud agnostic and is so widely used that it’s easy to find modules and examples. And the best part is, it’s open source! To show the true power of IaC we’re going to provision some resources in UpCloud.
Creating UpCloud resources through the web console
Creating cloud resources using the cloud provider’s web console is a common starting point when testing a new cloud provider, or just starting out in the cloud in general. This method which consists of mostly clicking mouse buttons is sometimes called ClickOps. Let’s create a virtual machine in UpCloud through the web console by clicking on the “Deploy server” button:

in UpCloud virtual machines are called servers
This opens up a page with lots of options for configuring the server in terms of location, size, storage and operating system. The web console makes it easy to discover available options and choose the ones that make sense for you:
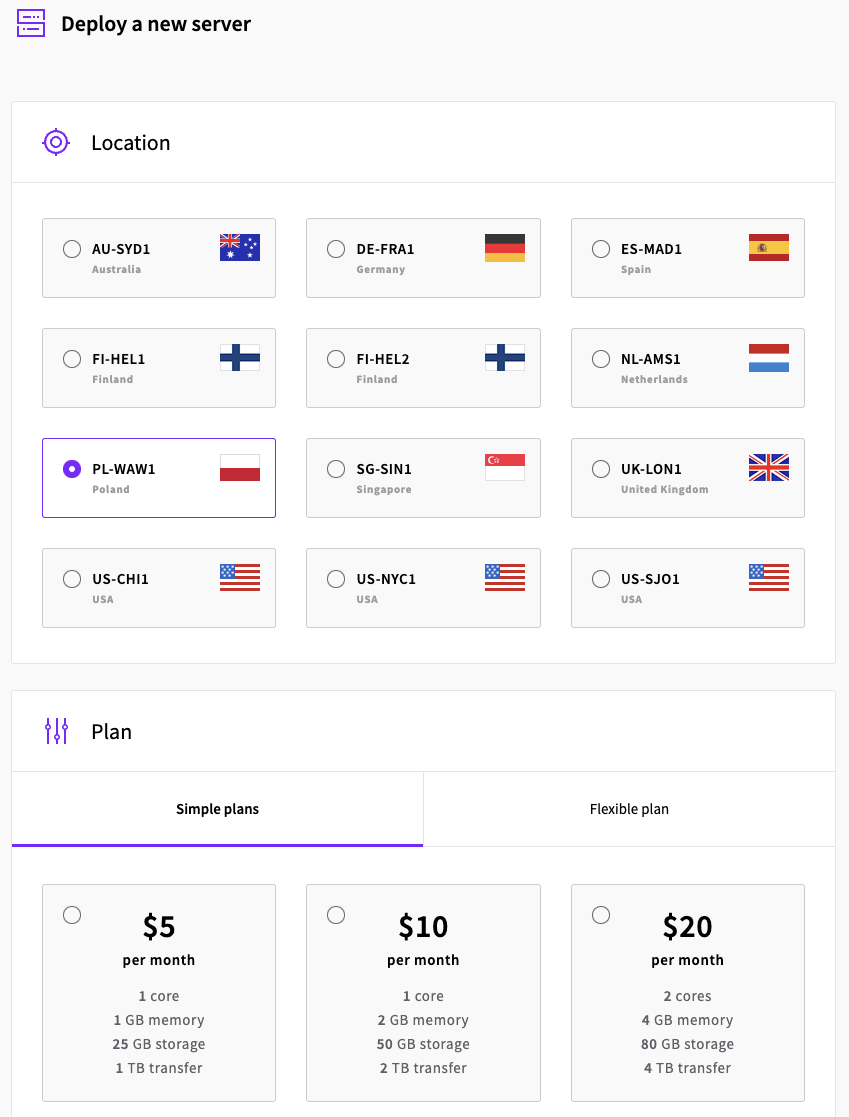
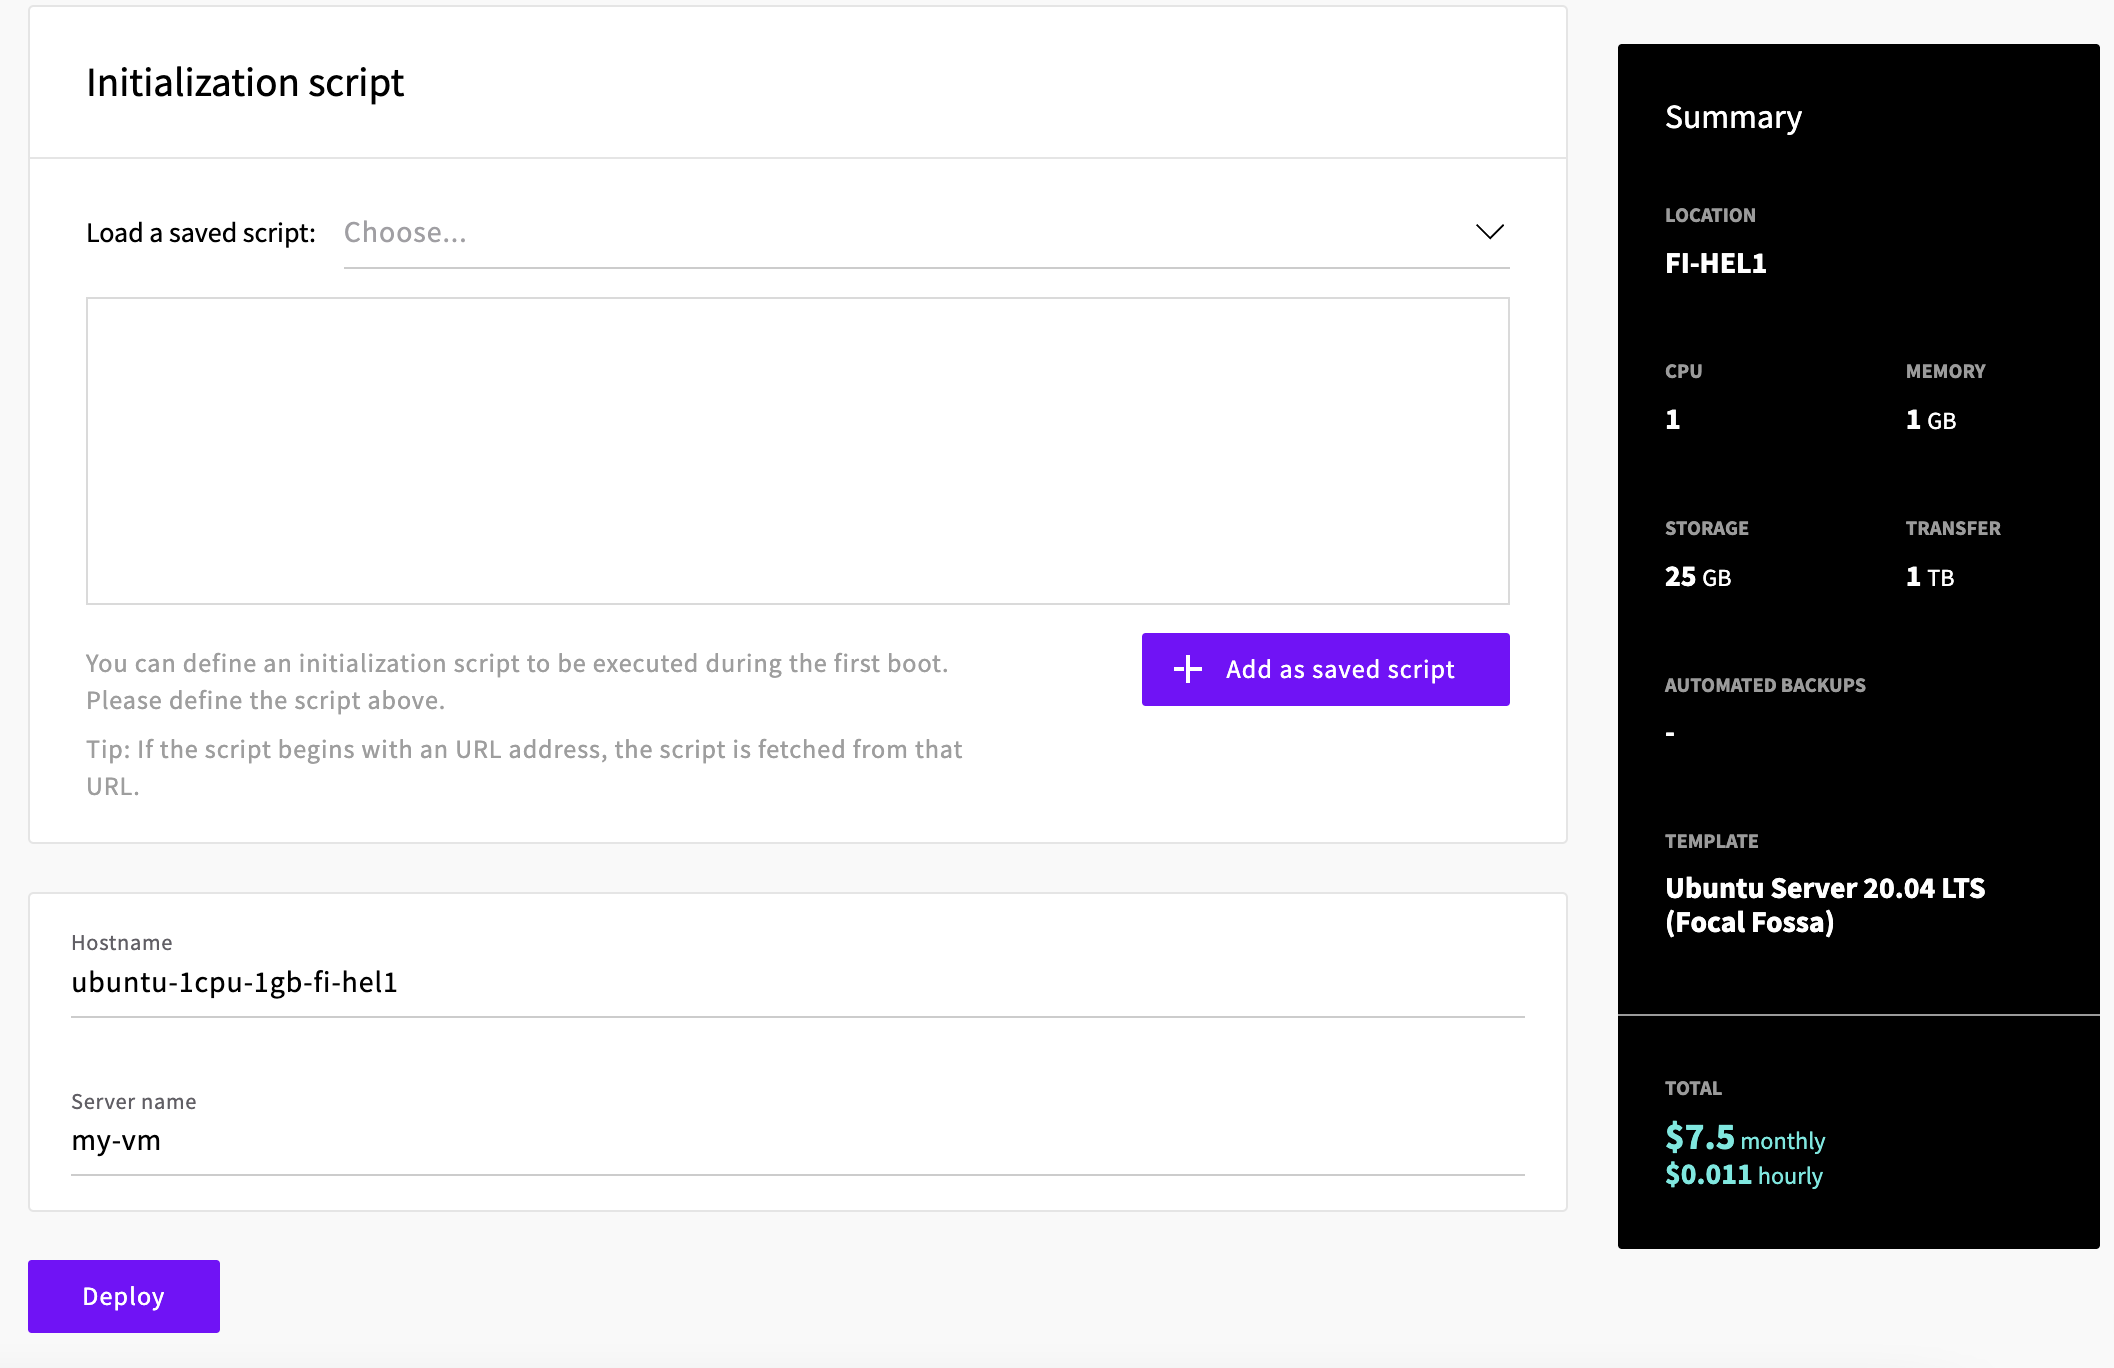
After choosing the options that fit our use-case we can deploy the virtual machine by clicking the “Deploy” button at the bottom of the page:
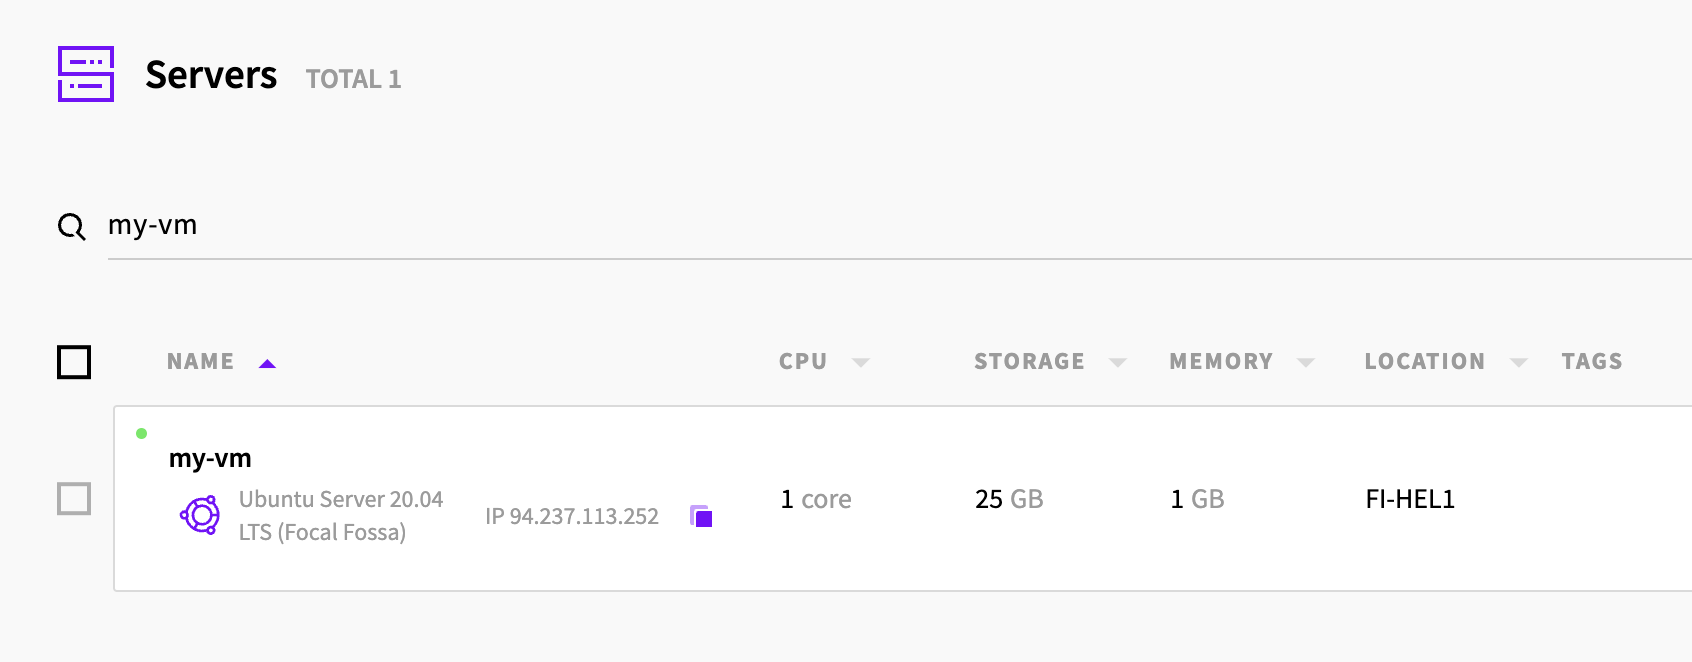
After a short wait the virtual machine is provisioned and ready to be used:
Managing the resources with Terraform
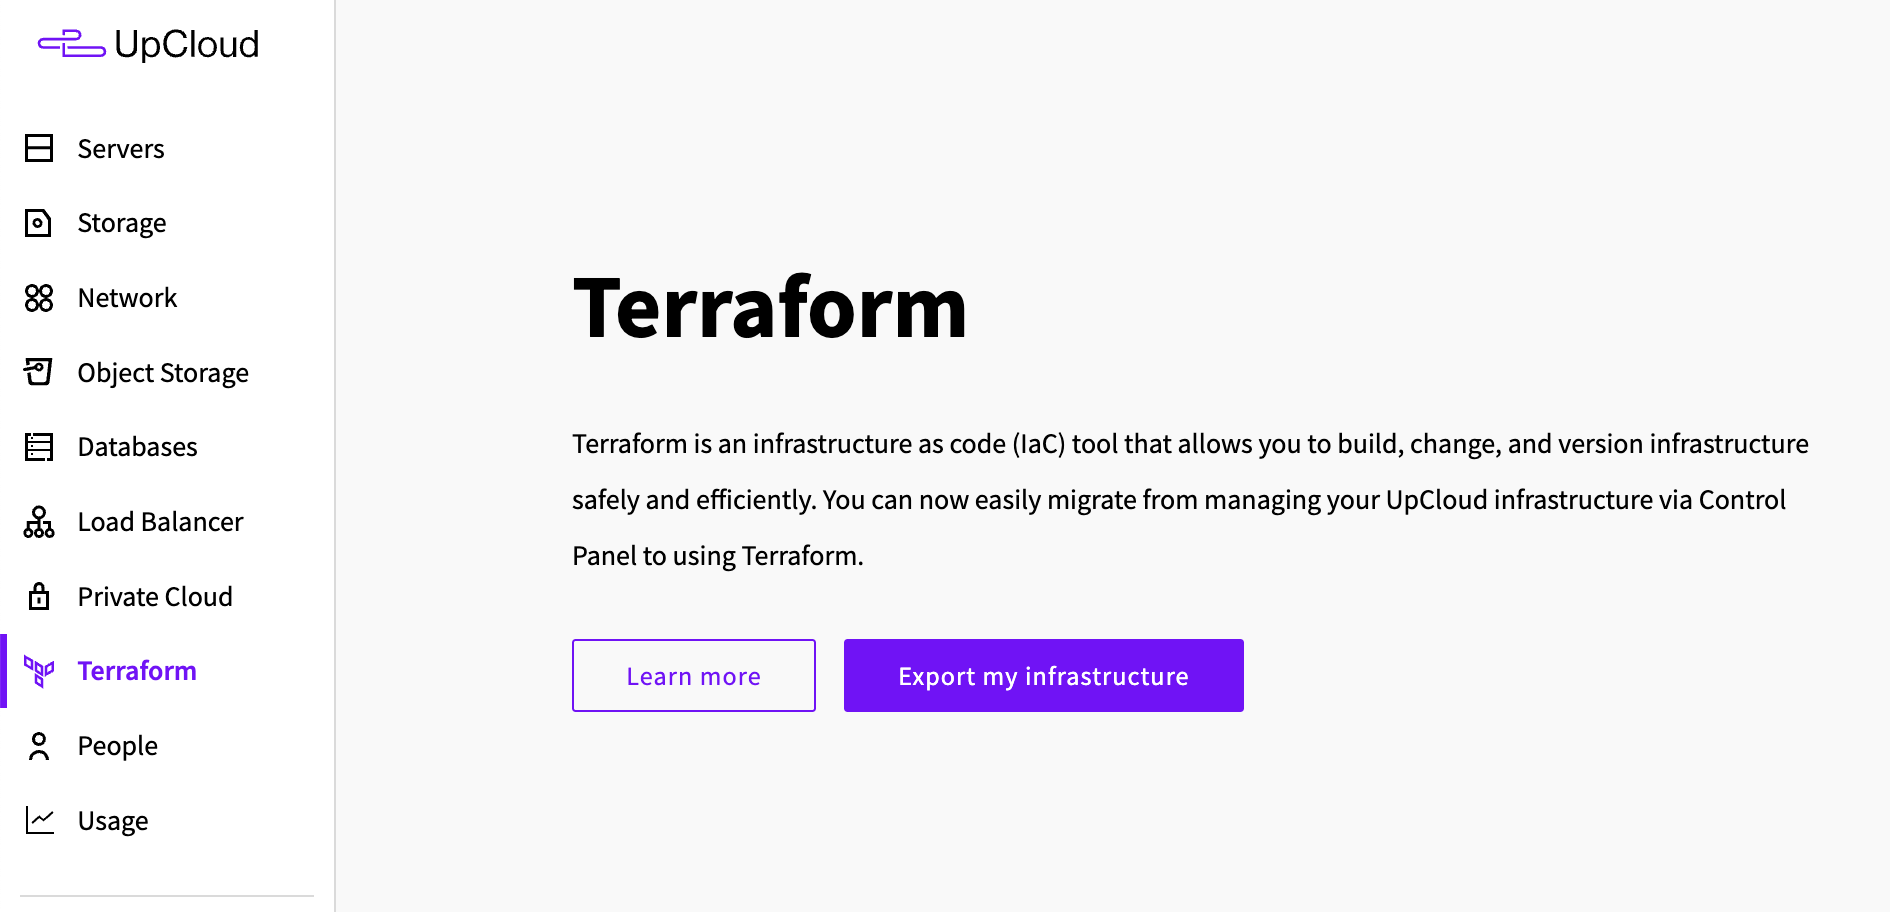
Now, you might be wondering what is the point of deploying a virtual machine through a web console in a blog post with “Infrastructure as Code” in the title? Well, turns out there’s a handy feature in UpCloud that lets us convert the server configured with ClickOps into Terraform configuration. Let’s click on the “Export my infrastructure” button to get started with this process:
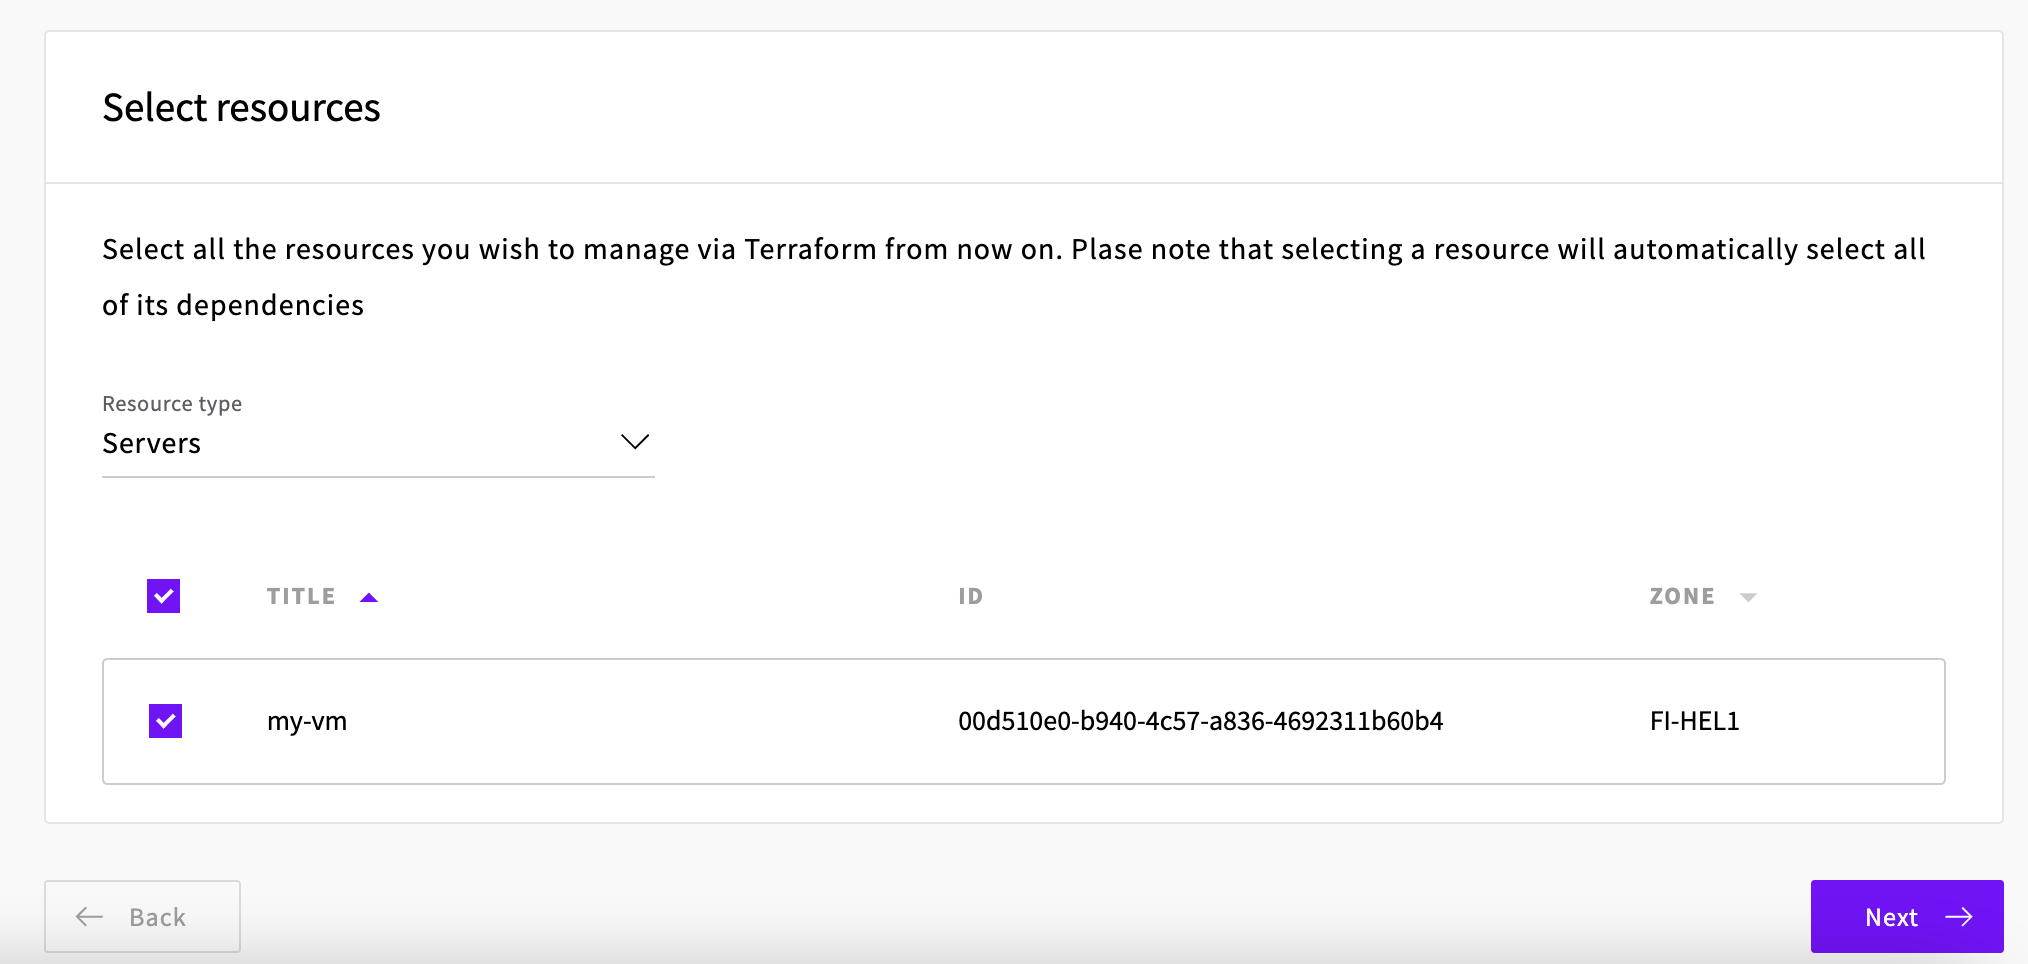
Firstly we select the type of resource to export and then the resource itself:
After a summary step we get the Terraform configuration and also handy commands on how to import this resource into Terraform state which means we can start managing the resource using Terraform now:
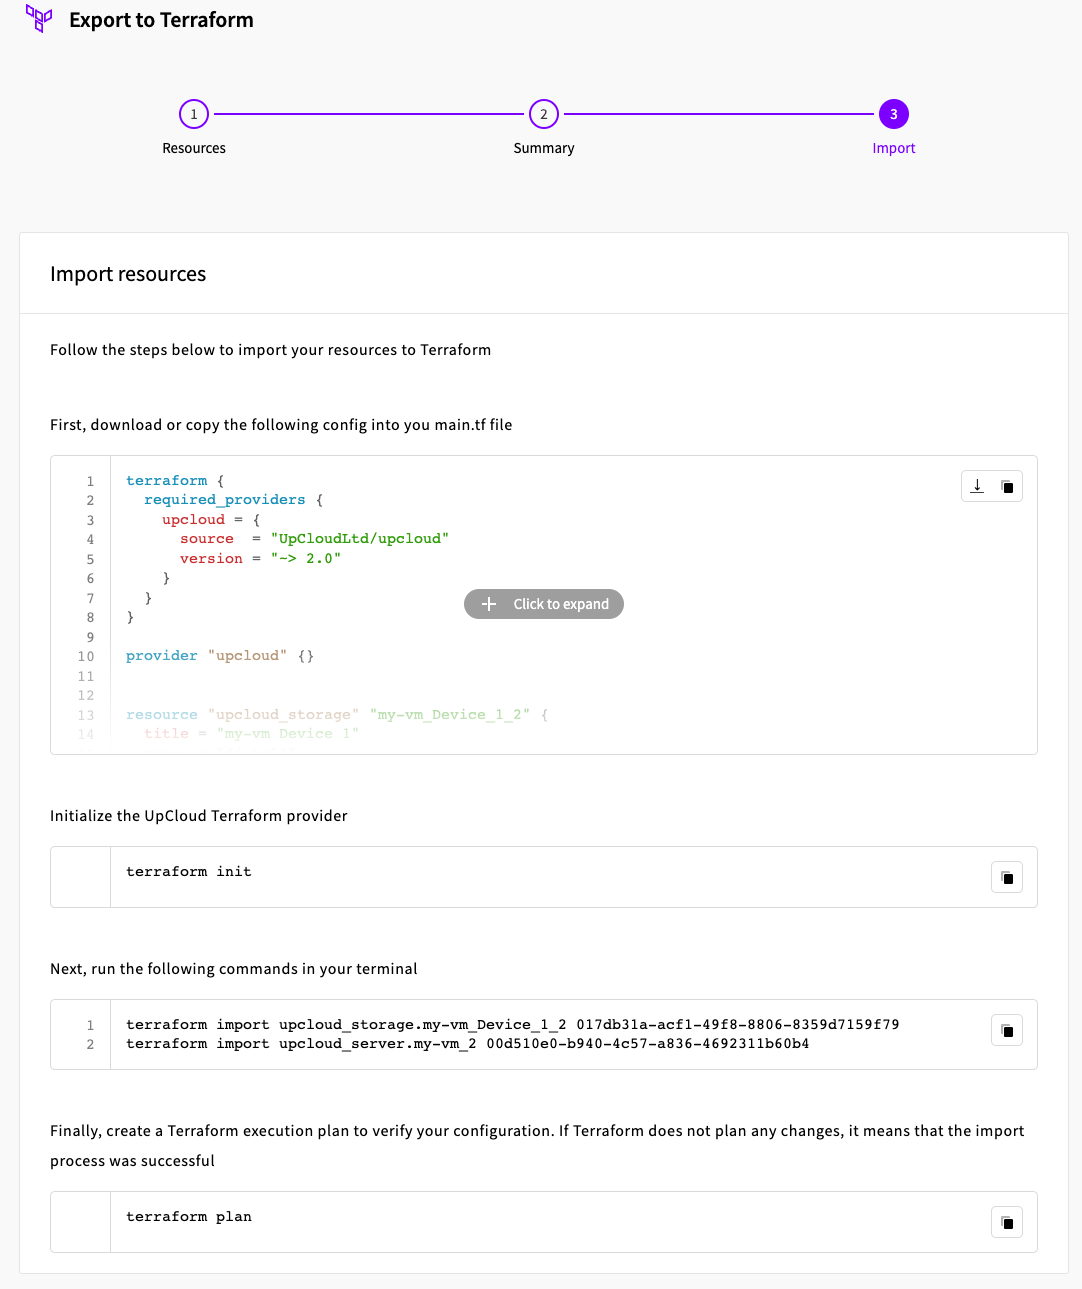
Let’s follow this process to import the resources into Terraform and see if there’s any benefit of doing so. Here’s the complete configuration for the virtual machine:
terraform {
  required_providers {
    upcloud = {
      source  = "UpCloudLtd/upcloud"
      version = "~> 2.0"
    }
  }
}

provider "upcloud" {}

resource "upcloud_storage" "my-vm_Device_1_2" {
  title = "my-vm Device 1"
  zone  = "fi-hel1"
  size  = 25
  tier  = "maxiops"
}

resource "upcloud_server" "my-vm_2" {
  title    = "my-vm"
  hostname = "ubuntu-1cpu-1gb-fi-hel1"
  zone     = "fi-hel1"
  metadata = false
  firewall = false
  plan     = "1xCPU-1GB"

  network_interface {
    type              = "public"
    ip_address_family = "IPv4"
  }

  network_interface {
    type              = "utility"
    ip_address_family = "IPv4"
  }

  storage_devices {
    address = "virtio"
    storage = upcloud_storage.my-vm_Device_1_2.id
    type    = "disk"
  }
}
Firstly, the above configuration is copied into a main.tf file and then we can initialise Terraform which downloads the official UpCloud Terraform provider to our local machine:
$ tree
.
└── main.tf

0 directories, 1 file
$ terraform init

Initializing the backend...

Initializing provider plugins...
- Finding upcloudltd/upcloud versions matching "~> 2.0"...
- Installing upcloudltd/upcloud v2.4.2...
- Installed upcloudltd/upcloud v2.4.2 (self-signed, key ID 60B4E1988F222907)

Partner and community providers are signed by their developers.
If you'd like to know more about provider signing, you can read about it here:
https://www.terraform.io/docs/cli/plugins/signing.html

Terraform has created a lock file .terraform.lock.hcl to record the provider
selections it made above. Include this file in your version control repository
so that Terraform can guarantee to make the same selections by default when
you run "terraform init" in the future.

Terraform has been successfully initialized!

You may now begin working with Terraform. Try running "terraform plan" to see
any changes that are required for your infrastructure. All Terraform commands
should now work.

If you ever set or change modules or backend configuration for Terraform,
rerun this command to reinitialize your working directory. If you forget, other
commands will detect it and remind you to do so if necessary.
Before actually invoking Terraform in the next step the UpCloud provider needs some credentials. Luckily, these are really easy to pass in using environment variables:
export UPCLOUD_USERNAME=<username>
export UPCLOUD_PASSWORD=<password>
For more details refer to UpCloud’s getting started with Terraform tutorial. Now with credentials in place, let’s import the virtual machine and its storage into the Terraform state:
$ terraform import upcloud_storage.my-vm_Device_1_2 017db31a-acf1-49f8-8806-8359d7159f79
upcloud_storage.my-vm_Device_1_2: Importing from ID "017db31a-acf1-49f8-8806-8359d7159f79"...
upcloud_storage.my-vm_Device_1_2: Import prepared!
  Prepared upcloud_storage for import
upcloud_storage.my-vm_Device_1_2: Refreshing state... [id=017db31a-acf1-49f8-8806-8359d7159f79]

Import successful!

The resources that were imported are shown above. These resources are now in
your Terraform state and will henceforth be managed by Terraform.

$ terraform import upcloud_server.my-vm_2 00d510e0-b940-4c57-a836-4692311b60b4
upcloud_server.my-vm_2: Importing from ID "00d510e0-b940-4c57-a836-4692311b60b4"...
upcloud_server.my-vm_2: Import prepared!
  Prepared upcloud_server for import
upcloud_server.my-vm_2: Refreshing state... [id=00d510e0-b940-4c57-a836-4692311b60b4]

Import successful!

The resources that were imported are shown above. These resources are now in
your Terraform state and will henceforth be managed by Terraform.
Now finally let’s make sure our state and configuration copied from the UpCloud console matches the deployed virtual machine:
$ terraform plan
upcloud_storage.my-vm_Device_1_2: Refreshing state... [id=017db31a-acf1-49f8-8806-8359d7159f79]
upcloud_server.my-vm_2: Refreshing state... [id=00d510e0-b940-4c57-a836-4692311b60b4]

No changes. Your infrastructure matches the configuration.

Terraform has compared your real infrastructure against your configuration and found no differences, so no changes are needed.
Now we can manage the virtual machine using Terraform.
Destroying the infrastructure with Terraform
Let’s say we want to destroy the machine because we don’t want to pay for it when we’re not actively using the machine. Now that we have defined the infrastructure as code, it’s not likely that we would forget how to recreate it! Destroying the resources with Terraform is done with terraform destroy:
$ terraform destroy
upcloud_storage.my-vm_Device_1_2: Refreshing state... [id=017db31a-acf1-49f8-8806-8359d7159f79]
upcloud_server.my-vm_2: Refreshing state... [id=00d510e0-b940-4c57-a836-4692311b60b4]

Terraform used the selected providers to generate the following execution plan. Resource actions are indicated with the following symbols:
  - destroy

Terraform will perform the following actions:

  # upcloud_server.my-vm_2 will be destroyed
  - resource "upcloud_server" "my-vm_2" {
      - cpu      = 1 -> null
      - firewall = false -> null
      - hostname = "ubuntu-1cpu-1gb-fi-hel1" -> null
      - id       = "00d510e0-b940-4c57-a836-4692311b60b4" -> null
      - mem      = 1024 -> null
      - metadata = false -> null
      - plan     = "1xCPU-1GB" -> null
      - title    = "my-vm" -> null
      - zone     = "fi-hel1" -> null

      - network_interface {
          - bootable            = false -> null
          - ip_address          = "94.237.113.252" -> null
          - ip_address_family   = "IPv4" -> null
          - ip_address_floating = false -> null
          - mac_address         = "5e:9f:e9:d3:15:36" -> null
          - network             = "035c9d71-ac3b-40dd-916f-cf993c408368" -> null
          - source_ip_filtering = true -> null
          - type                = "public" -> null
        }
      - network_interface {
          - bootable            = false -> null
          - ip_address          = "10.1.1.195" -> null
          - ip_address_family   = "IPv4" -> null
          - ip_address_floating = false -> null
          - mac_address         = "5e:9f:e9:d3:c2:b5" -> null
          - network             = "03a75f5f-3ed2-4598-aee0-8ba4825de8cb" -> null
          - source_ip_filtering = true -> null
          - type                = "utility" -> null
        }

      - storage_devices {
          - address = "virtio" -> null
          - storage = "017db31a-acf1-49f8-8806-8359d7159f79" -> null
          - type    = "disk" -> null
        }
    }

  # upcloud_storage.my-vm_Device_1_2 will be destroyed
  - resource "upcloud_storage" "my-vm_Device_1_2" {
      - delete_autoresize_backup = false -> null
      - filesystem_autoresize    = false -> null
      - id                       = "017db31a-acf1-49f8-8806-8359d7159f79" -> null
      - size                     = 25 -> null
      - tier                     = "maxiops" -> null
      - title                    = "my-vm Device 1" -> null
      - zone                     = "fi-hel1" -> null
    }

Plan: 0 to add, 0 to change, 2 to destroy.

Do you really want to destroy all resources?
  Terraform will destroy all your managed infrastructure, as shown above.
  There is no undo. Only 'yes' will be accepted to confirm.

  Enter a value: yes

upcloud_server.my-vm_2: Destroying... [id=00d510e0-b940-4c57-a836-4692311b60b4]
upcloud_server.my-vm_2: Still destroying... [id=00d510e0-b940-4c57-a836-4692311b60b4, 10s elapsed]
upcloud_server.my-vm_2: Destruction complete after 15s
upcloud_storage.my-vm_Device_1_2: Destroying... [id=017db31a-acf1-49f8-8806-8359d7159f79]
upcloud_storage.my-vm_Device_1_2: Destruction complete after 0s

Destroy complete! Resources: 2 destroyed.
After one simple command and waiting 15 seconds the machine is destroyed successfully. Now, would we remember how to recreate it using the web console? In case of a single machine, we just might. Though if the infrastructure is more complex we would need to store screenshots of what exactly we clicked in the console, or at least write down the options clicked in plain text. However we were smart, and exported the configuration from UpCloud console. So now we actually have all that information stored as code in the main.tf file.
Recreating the infrastructure with Terraform
Let’s recreate the machine based on the configuration with Terraform:
$ terraform apply
upcloud_storage.my-vm_Device_1_2: Refreshing state... [id=01b92f2c-e482-454f-be73-74a60d6c1364]

Terraform used the selected providers to generate the following execution plan. Resource actions are indicated with the following symbols:
  + create

Terraform will perform the following actions:

  # upcloud_server.my-vm_2 will be created
  + resource "upcloud_server" "my-vm_2" {
      + cpu      = (known after apply)
      + firewall = false
      + hostname = "ubuntu-1cpu-1gb-fi-hel1"
      + id       = (known after apply)
      + mem      = (known after apply)
      + metadata = false
      + plan     = "1xCPU-1GB"
      + title    = "my-vm"
      + zone     = "fi-hel1"

      + network_interface {
          + bootable            = false
          + ip_address          = (known after apply)
          + ip_address_family   = "IPv4"
          + ip_address_floating = (known after apply)
          + mac_address         = (known after apply)
          + network             = (known after apply)
          + source_ip_filtering = true
          + type                = "public"
        }
      + network_interface {
          + bootable            = false
          + ip_address          = (known after apply)
          + ip_address_family   = "IPv4"
          + ip_address_floating = (known after apply)
          + mac_address         = (known after apply)
          + network             = (known after apply)
          + source_ip_filtering = true
          + type                = "utility"
        }

      + storage_devices {
          + address = "virtio"
          + storage = "01b92f2c-e482-454f-be73-74a60d6c1364"
          + type    = "disk"
        }
    }

Plan: 1 to add, 0 to change, 0 to destroy.

Do you want to perform these actions?
  Terraform will perform the actions described above.
  Only 'yes' will be accepted to approve.

  Enter a value: yes

upcloud_server.my-vm_2: Creating...
upcloud_server.my-vm_2: Still creating... [10s elapsed]
upcloud_server.my-vm_2: Creation complete after 17s [id=0026b0b9-5b01-43ac-800b-47a3800e2315]

Apply complete! Resources: 1 added, 0 changed, 0 destroyed.
All it took was 17 seconds and the virtual machine is again provisioned.
Replicating the infrastructure with Terraform
By adding just a few lines of code to the main.tf we can tell Terraform to create many virtual machines in different locations:
terraform {
   required_providers {
     upcloud = {
       source  = "UpCloudLtd/upcloud"
       version = "~> 2.0"
     }
   }
 }

 provider "upcloud" {}

+locals {
+  regions = [
+    "fi-hel1",
+    "es-mad1",
+    "de-fra1",
+  ]
+}

 resource "upcloud_storage" "my-vm_Device_1_2" {
+  for_each = toset(local.regions)
+
   title = "my-vm Device 1"
-  zone  = "fi-hel1"
+  zone  = each.key
   size  = 25
   tier  = "maxiops"
 }

 resource "upcloud_server" "my-vm_2" {
+  for_each = toset(local.regions)
+
   title    = "my-vm"
-  hostname = "ubuntu-1cpu-1gb-fi-hel1"
-  zone     = "fi-hel1"
+  hostname = "ubuntu-1cpu-1gb-${each.key}"
+  zone     = each.key
   metadata = false
   firewall = false
   plan     = "1xCPU-1GB"

   network_interface {
     type              = "public"
     ip_address_family = "IPv4"
   }

   network_interface {
     type              = "utility"
     ip_address_family = "IPv4"
   }

   storage_devices {
     address = "virtio"
-    storage = upcloud_storage.my-vm_Device_1_2.id
+    storage = upcloud_storage.my-vm_Device_1_2[each.key].id
     type    = "disk"
   }
 }
Now when we run the Terraform the plan will be to add several machines into different data centres:
$ terraform plan
Terraform used the selected providers to generate the following execution plan. Resource actions are indicated with the following symbols:
  + create

Terraform will perform the following actions:

  # upcloud_server.my-vm_2["de-fra1"] will be created
  + resource "upcloud_server" "my-vm_2" {
      + cpu      = (known after apply)
      + firewall = false
      + hostname = "ubuntu-1cpu-1gb-de-fra1"
      + id       = (known after apply)
      + mem      = (known after apply)
      + metadata = false
      + plan     = "1xCPU-1GB"
      + title    = "my-vm"
      + zone     = "de-fra1"

      + network_interface {
          + bootable            = false
          + ip_address          = (known after apply)
          + ip_address_family   = "IPv4"
          + ip_address_floating = (known after apply)
          + mac_address         = (known after apply)
          + network             = (known after apply)
          + source_ip_filtering = true
          + type                = "public"
        }
      + network_interface {
          + bootable            = false
          + ip_address          = (known after apply)
          + ip_address_family   = "IPv4"
          + ip_address_floating = (known after apply)
          + mac_address         = (known after apply)
          + network             = (known after apply)
          + source_ip_filtering = true
          + type                = "utility"
        }

      + storage_devices {
          + address = "virtio"
          + storage = (known after apply)
          + type    = "disk"
        }
    }

  # upcloud_server.my-vm_2["es-mad1"] will be created
  + resource "upcloud_server" "my-vm_2" {
      + cpu      = (known after apply)
      + firewall = false
      + hostname = "ubuntu-1cpu-1gb-es-mad1"
      + id       = (known after apply)
      + mem      = (known after apply)
      + metadata = false
      + plan     = "1xCPU-1GB"
      + title    = "my-vm"
      + zone     = "es-mad1"

      + network_interface {
          + bootable            = false
          + ip_address          = (known after apply)
          + ip_address_family   = "IPv4"
          + ip_address_floating = (known after apply)
          + mac_address         = (known after apply)
          + network             = (known after apply)
          + source_ip_filtering = true
          + type                = "public"
        }
      + network_interface {
          + bootable            = false
          + ip_address          = (known after apply)
          + ip_address_family   = "IPv4"
          + ip_address_floating = (known after apply)
          + mac_address         = (known after apply)
          + network             = (known after apply)
          + source_ip_filtering = true
          + type                = "utility"
        }

      + storage_devices {
          + address = "virtio"
          + storage = (known after apply)
          + type    = "disk"
        }
    }

  # upcloud_server.my-vm_2["fi-hel1"] will be created
  + resource "upcloud_server" "my-vm_2" {
      + cpu      = (known after apply)
      + firewall = false
      + hostname = "ubuntu-1cpu-1gb-fi-hel1"
      + id       = (known after apply)
      + mem      = (known after apply)
      + metadata = false
      + plan     = "1xCPU-1GB"
      + title    = "my-vm"
      + zone     = "fi-hel1"

      + network_interface {
          + bootable            = false
          + ip_address          = (known after apply)
          + ip_address_family   = "IPv4"
          + ip_address_floating = (known after apply)
          + mac_address         = (known after apply)
          + network             = (known after apply)
          + source_ip_filtering = true
          + type                = "public"
        }
      + network_interface {
          + bootable            = false
          + ip_address          = (known after apply)
          + ip_address_family   = "IPv4"
          + ip_address_floating = (known after apply)
          + mac_address         = (known after apply)
          + network             = (known after apply)
          + source_ip_filtering = true
          + type                = "utility"
        }

      + storage_devices {
          + address = "virtio"
          + storage = (known after apply)
          + type    = "disk"
        }
    }

  # upcloud_storage.my-vm_Device_1_2["de-fra1"] will be created
  + resource "upcloud_storage" "my-vm_Device_1_2" {
      + delete_autoresize_backup = false
      + filesystem_autoresize    = false
      + id                       = (known after apply)
      + size                     = 25
      + tier                     = "maxiops"
      + title                    = "my-vm Device 1"
      + zone                     = "de-fra1"
    }

  # upcloud_storage.my-vm_Device_1_2["es-mad1"] will be created
  + resource "upcloud_storage" "my-vm_Device_1_2" {
      + delete_autoresize_backup = false
      + filesystem_autoresize    = false
      + id                       = (known after apply)
      + size                     = 25
      + tier                     = "maxiops"
      + title                    = "my-vm Device 1"
      + zone                     = "es-mad1"
    }

  # upcloud_storage.my-vm_Device_1_2["fi-hel1"] will be created
  + resource "upcloud_storage" "my-vm_Device_1_2" {
      + delete_autoresize_backup = false
      + filesystem_autoresize    = false
      + id                       = (known after apply)
      + size                     = 25
      + tier                     = "maxiops"
      + title                    = "my-vm Device 1"
      + zone                     = "fi-hel1"
    }

Plan: 6 to add, 0 to change, 0 to destroy.
Imagine creating these with ClickOps instead of a single Terraform command!
Meanwhile adding or removing one of the virtual machines can be done with a single line change now:
locals {
   regions = [
     "fi-hel1",
     "es-mad1",
     "de-fra1",
+    "us-nyc1",
   ]
 }
Share the code with others
Now we could commit this piece of infrastructure code into a Git repository and share it with other teams who can then provision exactly the same infrastructure using terraform apply. Actually there’s also a built-in way of sharing code called modules in Terraform. This also allows versioning the code to prevent other teams from pulling possible breaking changes if they choose to pin the version.
Summary
Hopefully this post has given you some ideas of how infrastructure as code tools like Terraform can help to manage your cloud infrastructure effectively. Let’s quickly recap the key takeaways:
Benefits of Infrastructure as Code
- Create the same resource using a single command.
- Replicate those resources to multiple cloud regions with a few lines of code.
- Save costs by removing resources when not in use.
- Easily recreate resources from scratch.
- The code serves as the documentation of the infrastructure.
- Storing the code in version control gives the ability to audit changes overtime.
If you have any questions, feedback or want help with Infrastructure as Code please leave us a comment or get in touch here!